| Latest version | 12.02 |
|---|---|
| Minimum Core | 12 |
| Compatible Core | 12 |
| Last updated | 1 year ago |
| Created | 4 years ago |
| Authors | |
| Languages |
Deutsch English Español Français Italiano Português Svenska 日本語 正體中文 |
| Systems | All systems |
| Dependencies |
Lib: Document Sheet Registrar |
| Project source | Project URL |
| Report bugs | Bug tracker URL |
Monk's Enhanced Journal
This is an enhanced version of the journal. It allows for multiple types of journal entries, and adds increased functionality such as searching, private notes, bookmarks, and tabs.
Usage & Current Features

The new interface adds the journal directory on the right-hand side of the window, a tab bar and bookmark bar along the top, as well as additional tools relevant to the journal entry loaded.
![]()
Right-clicking on the Journal Directory tab on the sidebar will open the Enhanced Journal window.
Tab Bar
![]()
You can open multiple journal entries in Enhanced Journal by clicking on the + button to the right of the tabs. Once a new tab is open, clicking on items in the Journal Directory will open that entry in the new tab.
Bookmark Bar
![]()
If you have Journal Entries that you reference a lot, you can add them to the bookmark bar by clicking on the star button. Clicking on a bookmark button will open that entry in the current tab. To delete a bookmark button, right-click the entry and select Delete from the drop-down menu.
Forward/Back buttons, and additional tools
At the top of the Journal Pages on the left side will be a forward and back button. As you open pages within a tab, you can use the forward and back button to navigate the history of pages you've visited. Right-clicking on these buttons will also show a menu of all pages in the history so you can navigate directly to a previous page.
On the right side will be additional tools available for each journal page. These are specific to the type of Journal Entry being viewed.
Common to all entries is the locate button, that will center the screen on the Note icon that represents this journal entry. So, when you drag and drop a journal entry on the map, pressing this button from the Enhanced Journal will help locate it on the map.
Also common to most entries is the Show to players button, that will show a copy of the journal entry on the players screens. You can choose to send this entry to all players or choose which players can view it. Shift clicking this button will show the full entry to all players. Ctrl clicking will send just the image to all players. You can choose to send the full entry or just the picture when selecting what player to send it to.

And Journal Entries that contain text descriptions have a search box that will search the description and highlight words that match what's typed in the search box. Which is useful to look things up, when a player has asked about something and you can't remember where in the big block of text it's mentioned.
New Journal Entry Types
Along with the regular journal entry, you can now create entries that are just a picture, represent a person, place, quest, encounter, and can create a slideshow for a multimedia presentation for your players.
Specific icons for each journal type are added to both the standard Journal Directory and the Journal Directory on the Enhanced Journal window so that you can see at a glance what type each entry represents.
Picture

This is to represent a single picture. It's like the image part of an old journal entry.
Journal Entry

This is to represent a journal entry. It's like the text part of an old journal entry.
The Enhanced Journal sheet will contain tabs for both the text and picture componants of a Journal Entry. But you can also choose to view it as text only, or as the original sheet for Journal Entries.
Person

This represents a person in your world. This person most likely won't have a token, but still needs to be referenced and have information available. You can upload a picture, add information to relevant properties and add descriptive text. There is also a notes section where you can add private notes to this journal entry.
Place
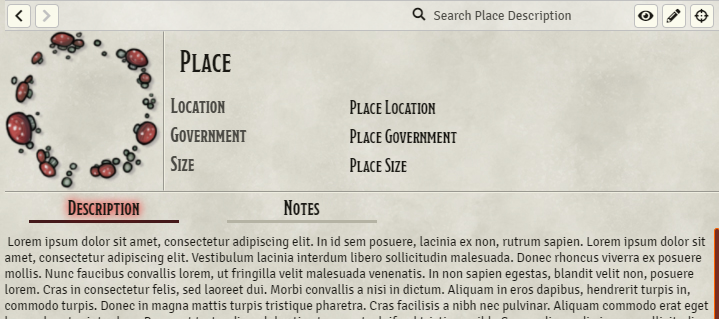
This is like the Person entry and represents a place that could be visited in your world.
Encounter

This represents an encounter on the map. There is a place to add a description of what's happening at this location.
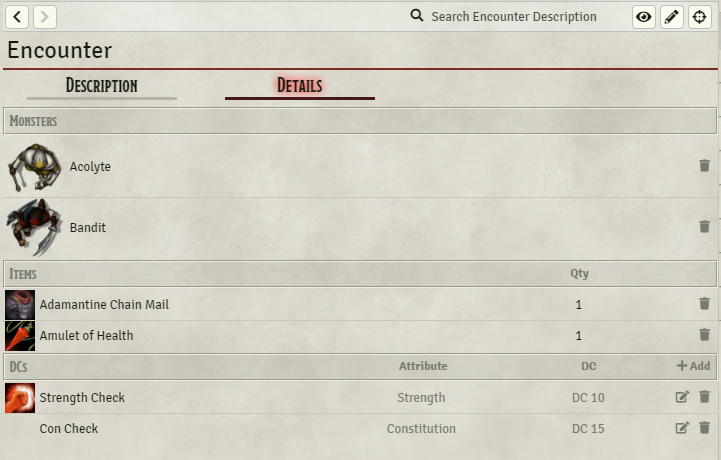
On the second tab you can store information on what monsters will be encountered, what items could be gained at this location, and what DCs could be triggered. To add a monster or item to the entry, drag the appropriate icon onto the sheet. Dragging the monster icon from the entry to the canvas will create a representative token on the map. Clicking on the dice icon, on a DC row will prompt for a dice roll. Currently it's set to use Monk's Tokenbar to request those rolls, but I have plane to expand this in the future.
Slideshow

If you want to create a multimedia presentation for your players to introduce your module, you can use a slideshow. A slideshow can be shown to the players in a window, on the canvas but still allowing access to other windows or covering everything so they can be more immersed in the presentation. You can also add an audio file to play once the slideshow starts.
Clicking on the Plus tool button will add another slide. You can customise a slide by setting the background image and setting how that image is displayed. You can also add text to the slide, change the colour of that text, and change where it's positioned. You can also customise how long the slide is shown for, and what kind of effect is used to transition to the next slide.
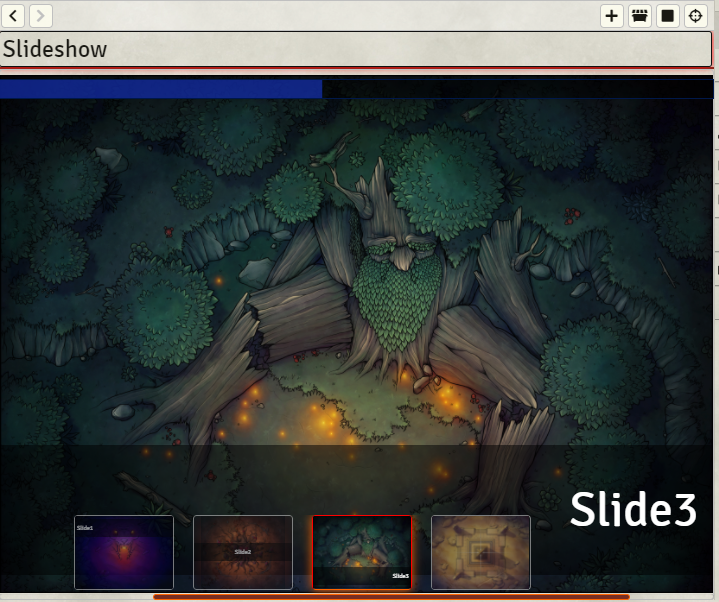
When you wish to play the slideshow, press the play button and it will be displayed on the players screen and begin the animations. The current slide will be shown in the journal window, with the remaining slides showing along the bottom. Clicking on the slides along the bottom will show that specific slide, if the display length of a slide has been set to manual, then click the slide to advance to the next one, and right-click to reverse a slide. A progress bar along the top will show you how much time is left in the slide before the next one is shown.
Quest
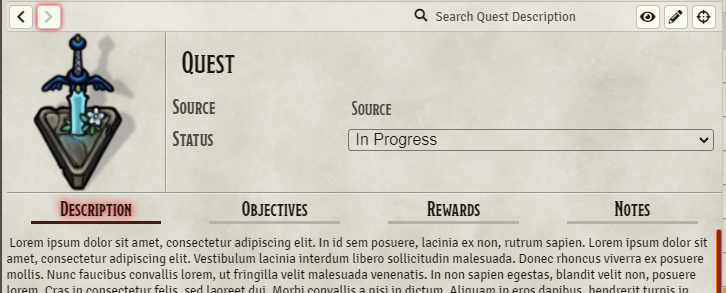
This represents potential side quests that your player could complete.

You can set objective to complete, and these objectives will be displayed for any in progress quest when the Notes tool is selected.
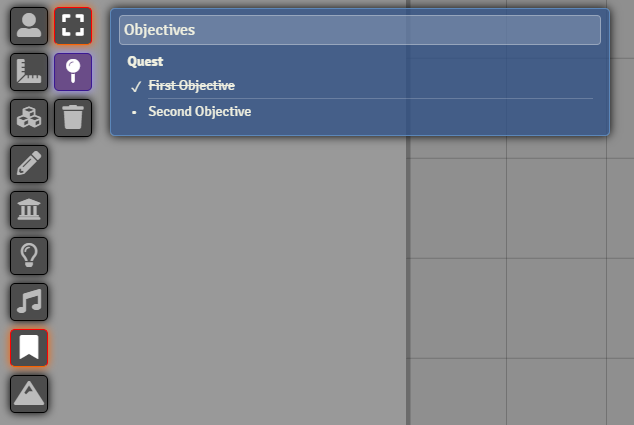

You can also set the rewards that are gained by completing this quest. To add an item, drag the item icon on the journal page.
Checklist

The Checklist represents a list of items that chan be checked off. Items can be dragged between folders and re-ordered.
Shop

This represents a Shop that contains Items which the players can purchase.
Player purchasing can be set so that the shop is closed and not visible, open but unavailable for purchase, or set up so the GM distributes items, the items can be requested for puchase, or just open for the players to purchase whatever they want.
If the currency beign used is specified the shop will attempt to determine if the actor has enough funds to purchase the item. Setting the Quantity to blank means the item has infinite quantity, otherwise the quantity is decreased each time the player receives an item.
Price is the store price, and Cost is what the players will see, so you can auto scale the pricing based on the shop keepers attitude towards the party.
Items can be locked so that a player doesn't have access to purchasing the item, and can be hidden from the player, if for instance the shop has the item, but the players need to enquire about it.
You can also fill a Shop using a RollTable.
Loot
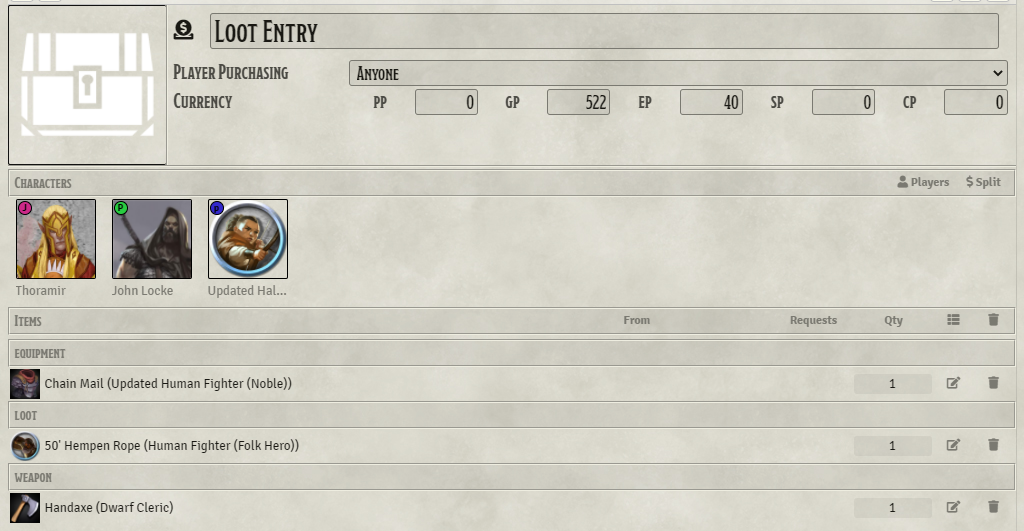
Loot represents loot gathered from an encounter. You can drag and drop characters into the list of characters. Double-clicking on the portrait will quickly open up the associted character.
As with a Shop, you can set the availability so that the GM has to distribute items, the player needs to request the item, or they can take what they want.
You can fill the loot from a Roll Table.
You can split the currency between the associated characters.
The Loot entry will also integrate with Monk's Tokenbar, so when an encounter/combat is finished, the items left by the NPC's can be added to a Loot Entry.
Old Entry
Journal Entries that were created outside of Enhanced Journal are represented by both a text area and a picture area. Since they could be created with either or both I didn't want that information to be lost.
Actor
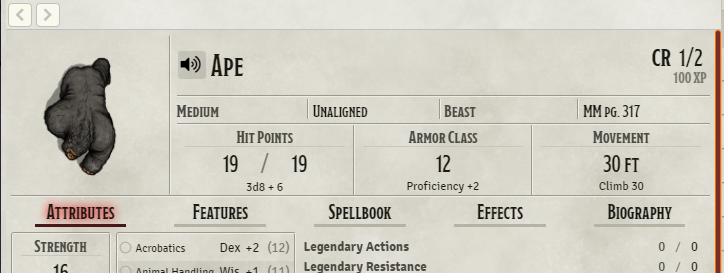
If you draw an actor onto a blank tab, or onto a journal page that isn't an encounter, it will open that actor in its own page. The idea is that you can prepare for an encounter by having the text on one tab, and any monsters that could be encountered on separate tabs, that way you can switch between them easily.


